
Tuesday, April 20, 2010

Monday, April 19, 2010
Make a Collage Using Mosaic Effect - PHOTOSHOP TUTORIAL
Here I’ll show you how to make a collage, using mosaic effect.
Ok, start with creating a new document sized 500×500 pixels and use the Paint Bucket Tool to fill canvas area with color of #355b00.

After that create a new layer and apply the Elliptical Marquee Tool to make a sphere selection as on a picture below, then fill this selected area with color of #97f501

Remove selection with pressing Ctrl+D and for the image jitter apply Filter > Blur > Gaussian Blur with 67 pixels of radius.

Then mess with the layer mode. I tried Overlay.

Merge two of these layers in one and start with creating mosaic. I want to try to draw mosaic flower. Let’s start! In the beginning create a new one layer and then select the Elliptical Marquee Tool to make selection like on the picture below. Fill this selection with any color you like, It doesn’t matter now.

After that create another one selection as on my screenshot what you can see below, invert it with Ctrl+Shift+I and press Delete button to clear selection.

Remove selection with Ctrl+D. We get the first petal of the mosaic. Move it in the same position as mine.

After that duplicate this layer (Layer > Duplicate Layer), then reduce it a little bit and rotate with Edit > Transform > Free Transform.

Make the petal selection using Select > Load Selection and apply Select > Modify > Expand to expand selection about 2 pixels. Move to the lower layer and press Delete to clear selection. Your result should be as mine.

Now, remove selection with Ctrl+D. Move to the upper layer again and duplicate it with Ctrl+J. After that merge all layers with petals in one layer, except topmost. Go back to it and rotate it as the layer before.

Create more petals in the same way.

Ok, after that merge all of layers with petals in one and apply Gradient Overlay and Stroke layer styles for current layer.


See the result below.

Ok, now I would like to add a couple of other colors petals to create cool mosaic effect. Create a new one leaf as was written on this lesson in the beginning. Apply color of #82a203 for this layer.

After that apply Stroke layer style to this layer.

Now, we have something like this:

Ok, then add a couple of petals more to the mosaic. Apply the same Blending Options as before to each layer.

Merge all layers with petals in one layer. After that select the Burn Tool (Brush: 100 px, Range: Midtones, Exposure: 50%) to add gradients somewhere on the flower.

Apply another one Blending Option to received layer: Outer Glow.

You can see the result below.

After that move to the next step. Press Ctrl+J to copy the layer and hide the copy (click on the eye, which indicates layer visibility). Go to lower layer and set opacity up to 18%. Go back to the hidden copy of layer and make it visible again. Press Ctrl+T to reduce this layer as was shown on my picture below.

Ok, we are almost done with this tutorial, but one more step left. Then I would like to add some floral elements. For this you can use these brushes or feel free to use your own. Go to the background layer and create a new one layer above. Create a composition like on picture shown below using Brush Tool and white color of prints. Change layer mode to Overlay and set opacity up to 40% for this layer.

After that create a new one layer more and add a couple of floral prints more in black color. Set opacity up to 25% for this layer.

Looks good, isn’t it? Hope I liked this tutorial and get adorable results. We are done for now! Good luck in your experiments!
READ MORE- Make a Collage Using Mosaic Effect - PHOTOSHOP TUTORIAL
Ok, start with creating a new document sized 500×500 pixels and use the Paint Bucket Tool to fill canvas area with color of #355b00.
After that create a new layer and apply the Elliptical Marquee Tool to make a sphere selection as on a picture below, then fill this selected area with color of #97f501
Remove selection with pressing Ctrl+D and for the image jitter apply Filter > Blur > Gaussian Blur with 67 pixels of radius.
Then mess with the layer mode. I tried Overlay.
Merge two of these layers in one and start with creating mosaic. I want to try to draw mosaic flower. Let’s start! In the beginning create a new one layer and then select the Elliptical Marquee Tool to make selection like on the picture below. Fill this selection with any color you like, It doesn’t matter now.

After that create another one selection as on my screenshot what you can see below, invert it with Ctrl+Shift+I and press Delete button to clear selection.

Remove selection with Ctrl+D. We get the first petal of the mosaic. Move it in the same position as mine.
After that duplicate this layer (Layer > Duplicate Layer), then reduce it a little bit and rotate with Edit > Transform > Free Transform.

Make the petal selection using Select > Load Selection and apply Select > Modify > Expand to expand selection about 2 pixels. Move to the lower layer and press Delete to clear selection. Your result should be as mine.

Now, remove selection with Ctrl+D. Move to the upper layer again and duplicate it with Ctrl+J. After that merge all layers with petals in one layer, except topmost. Go back to it and rotate it as the layer before.

Create more petals in the same way.

Ok, after that merge all of layers with petals in one and apply Gradient Overlay and Stroke layer styles for current layer.
See the result below.
Ok, now I would like to add a couple of other colors petals to create cool mosaic effect. Create a new one leaf as was written on this lesson in the beginning. Apply color of #82a203 for this layer.
After that apply Stroke layer style to this layer.
Now, we have something like this:
Ok, then add a couple of petals more to the mosaic. Apply the same Blending Options as before to each layer.

Merge all layers with petals in one layer. After that select the Burn Tool (Brush: 100 px, Range: Midtones, Exposure: 50%) to add gradients somewhere on the flower.

Apply another one Blending Option to received layer: Outer Glow.
You can see the result below.
After that move to the next step. Press Ctrl+J to copy the layer and hide the copy (click on the eye, which indicates layer visibility). Go to lower layer and set opacity up to 18%. Go back to the hidden copy of layer and make it visible again. Press Ctrl+T to reduce this layer as was shown on my picture below.

Ok, we are almost done with this tutorial, but one more step left. Then I would like to add some floral elements. For this you can use these brushes or feel free to use your own. Go to the background layer and create a new one layer above. Create a composition like on picture shown below using Brush Tool and white color of prints. Change layer mode to Overlay and set opacity up to 40% for this layer.

After that create a new one layer more and add a couple of floral prints more in black color. Set opacity up to 25% for this layer.

Looks good, isn’t it? Hope I liked this tutorial and get adorable results. We are done for now! Good luck in your experiments!
Saturday, April 17, 2010
MPV terbabas, terbakar: Achik Spin maut nahas ngeri

Allahyarham, yang berada di dalam kenderaan pelbagai guna (MPV) yang terbabas dan terbakar, meninggal dunia di tempat kejadian.
Pada masa ini, polis dan anggota bomba masih lagi berada di lokasi nahas dan difahamkan mayat Allahyarham akan dibawa ke Hospital Tuanku Jaafar di sini malam ini.
Pegawai Turus Trafik negeri, Asisten Supritendan Polis (ASP) Abd. Halil Abd. Hamzah mengesahkan kejadian tersebut. – Utusan
Friday, April 16, 2010
10 Way To Makes Blog Traffic
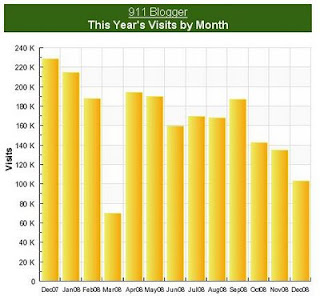
1. Create link clusters within your blog
A link cluster is a group of links that you can point at a post or page to improve its search engine ranking. Let’s say you have a post that’s ranked for ’stupid business ideas’. Edit 10 of your other posts to create links (using ’stupid business ideas’ as the anchor text) to the ’stupid business ideas’ post and you will surely move up in Google for that keyword. This process can be implemented in about 10 minutes and can be used for any keyword your site ranks for or is trying to rank for.
2. Rework HTML title tags of trafficked posts
By watching your stats, you can often identify posts that get search traffic from a keyword, even though the keyword isn’t listed in the HTML title of the post. By editing your posts’ HTML titles to add the keywords they cover, you can strengthen the rankings and therefore the traffic that the post generates. You can easily make a difference with this method in less than 20 minutes. This method combines very well with #1.
3. Invite your readers to connect with you on StumbleUpon and Facebook
You can never ever have too many friends on SU and Facebook. Inviting existing readers to find you on these services with a post should take less than 20 minutes.
4. Save your best posts for the best times of the week
Writing a home-run post on a Saturday afternoon will probably happen from time to time. However, does your blog have good traffic on Saturdays? Analyzing your blog’s stats to determine when it naturally has the most traffic can get more eyes on a great post, which will translate to more social votes and more links. If you have created the post of your life, wait for a good day to publish – it will cost you about 1 minute on a later date to put it up.
5. Edit your post one more time
How can you improve your title? How can you improve your first paragraph? Small details in your post, especially in the beginning of your post, can make an enormous difference in its ability to draw social traffic and links. You can definitely improve your title, first paragraph, formatting, and grammar within 30 minutes.
6. Stop writing about yourself. Start solving problems
Surfers become readers when a blog provides something that is wanted. A casual visitor may read your blog because they find training, answers to problems, entertainment, or something else they want. This more than likely will mean that they won’t want to read about you, your girlfriend, your cats, your kids, or your catastrophes (unless you have a personal blog that your friends read). Discontinuing the off-topic posts will help you to develop more repeat traffic and takes exactly 0 minutes to implement.
7. Subscribe to the feeds of your industry’s major players
That way, you won’t miss important news releases. When news breaks in your industry, there will be a lot of extra traffic searching for information on the event. Adding your thoughts will almost always generate extra traffic. Subscribing to the feeds of your industry’s top sites should take no more than 15 minutes.
8. Give a great post to a prominent blog
Let’s say that you took the time to write something great. Donating your post to a great blogger can help you to create a win-win. The great blogger gets a great piece of content that will bring him social traffic and links and you can create exposure for your name and brand. Emailing your post to a great blogger or blog takes less than 10 minutes.
9. Go to the store
Look at magazines. Pay special attention to the types of titles that are used on the covers. Write down the most interesting titles and think about what makes them interesting. In order to generate buzz around a post, a great title is an absolute necessity. More on this topic here: The Cosmo Headline Technique for Blogging Inspiration. You should be able to find some good title ideas in about 30 minutes.
10. Answer your email and comment questions
Nothing will show a reader that you care more than answering an question (even if you have already answered that question 100 times on your site). Why do people read your blog? Because you solve their problems. Why will they come back again and again to your blog? Because you solve their problems. Answering a person’s email or comment question should take less than 5 minutes.
SPREAD THE LOVE, SHARE OUR ARTICLE


Free Blog Header Templates - Fellowsisters
full view 1 | full view 2 | download
The first image is a little tribute to Escher’s “Drawing Hands”. It is an adaptation of the big old theme of the boundaries of representation but with the Fellowsisters as main characters. It also contains a reference to the Plinian Myth of the origin of Painting.

In the second image the two cups of tea are associated with a moment of relax. Usually the Fellowsisters are represented by two female figures or by two analogue or complementary objects. Designed by María from Spain.

READ MORE- Free Blog Header Templates - Fellowsisters
The first image is a little tribute to Escher’s “Drawing Hands”. It is an adaptation of the big old theme of the boundaries of representation but with the Fellowsisters as main characters. It also contains a reference to the Plinian Myth of the origin of Painting.

In the second image the two cups of tea are associated with a moment of relax. Usually the Fellowsisters are represented by two female figures or by two analogue or complementary objects. Designed by María from Spain.

Subscribe to:
Posts (Atom)
